Proxying Plausible through Cloudflare
You can use Cloudflare Workers to proxy your Plausible Analytics requests. Cloudflare Workers offers free service for up to 100,000 requests per day. All you need to set it up is a free Cloudflare account. Here's the step-by-step process for creating a proxy.
Our managed proxy lets you send analytics through your own domain name as a first-party connection. All you need to do is set up a CNAME record using the instructions we'll send you and update the snippet on your site. We'll take care of everything else. Contact us for details.
Step 0: Sign up for a free Cloudflare account if you don't have an account already and add your site.
Step 1: Create a worker
In your Cloudflare account, click on the "Compute (Workers" > 'Workers & Pages' section in the sidebar to get the 'Overview' page. Choose "Start with Hello World!" and then click on "Get Started" to start configuring your proxy.
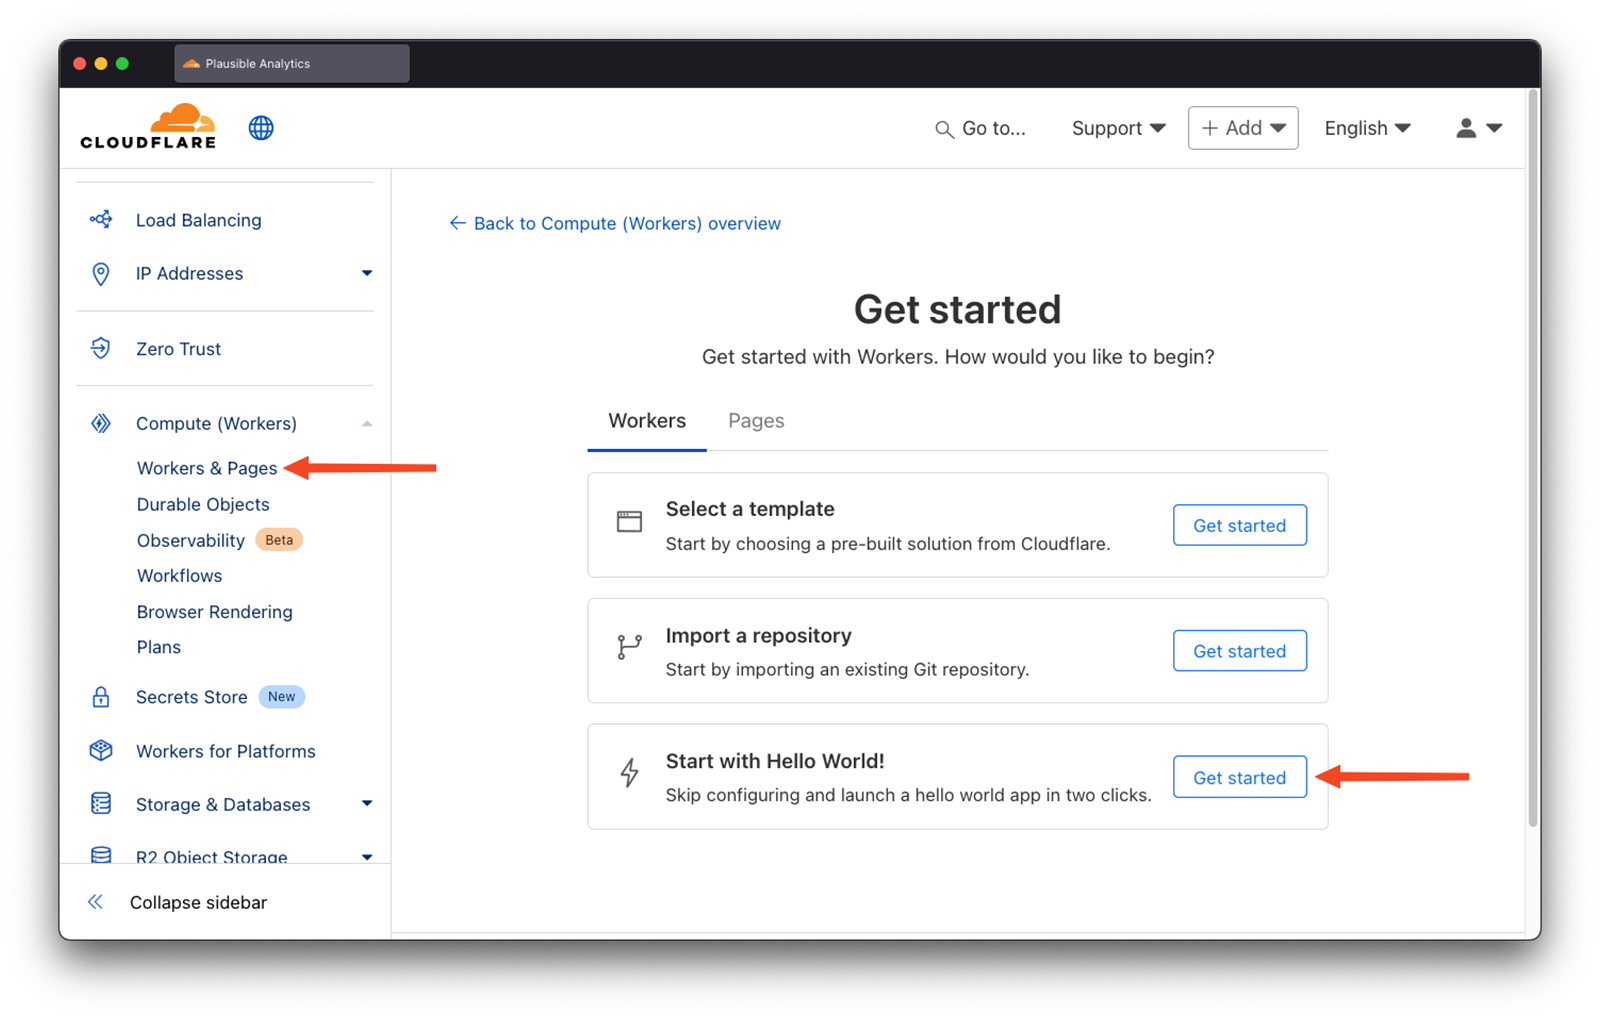
Step 2 (Optional): You can change your service name
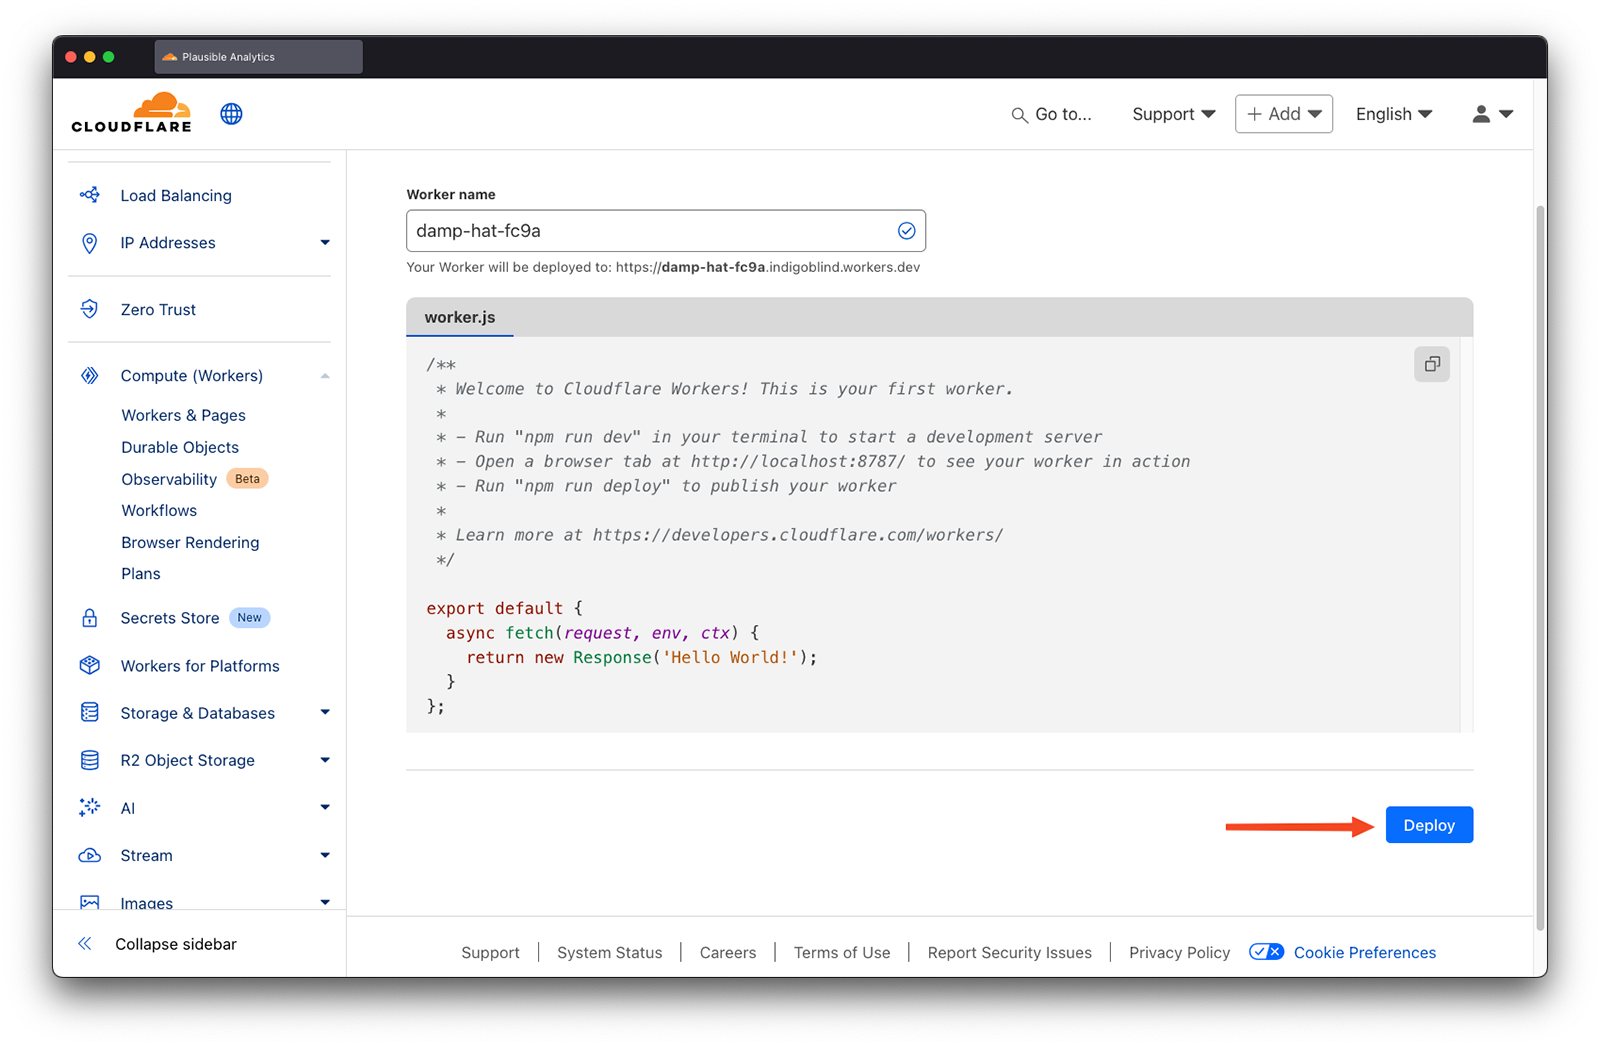
This is optional but you can change the service name to give your worker a more meaningful name. Do avoid words like 'plausible', 'analytics', 'tracking', 'stats', etc. as they may be blocked. It's also fine to keep the random name that Cloudflare generates by default. Then click on the 'Deploy' button.
Step 3: Get your snippet
In the "Site Installation" area of the "General" section in your site settings you can see the snippet specific for your site. It will look similar to the following:
<script async src="https://plausible.io/js/pa-XXXXX.js"></script>
<script>
  window.plausible=window.plausible||function(){(plausible.q=plausible.q||[]).push(arguments)},plausible.init=plausible.init||function(i){plausible.o=i||{}};
  plausible.init()
</script>
Your snippet will have a different script location than the example above. Look for the https://plausible.io/js/pa-XXXXX.js part in your snippet - that's the personalized location for your site's script. Mark it down for subsequent steps.
Step 4: Paste the following code
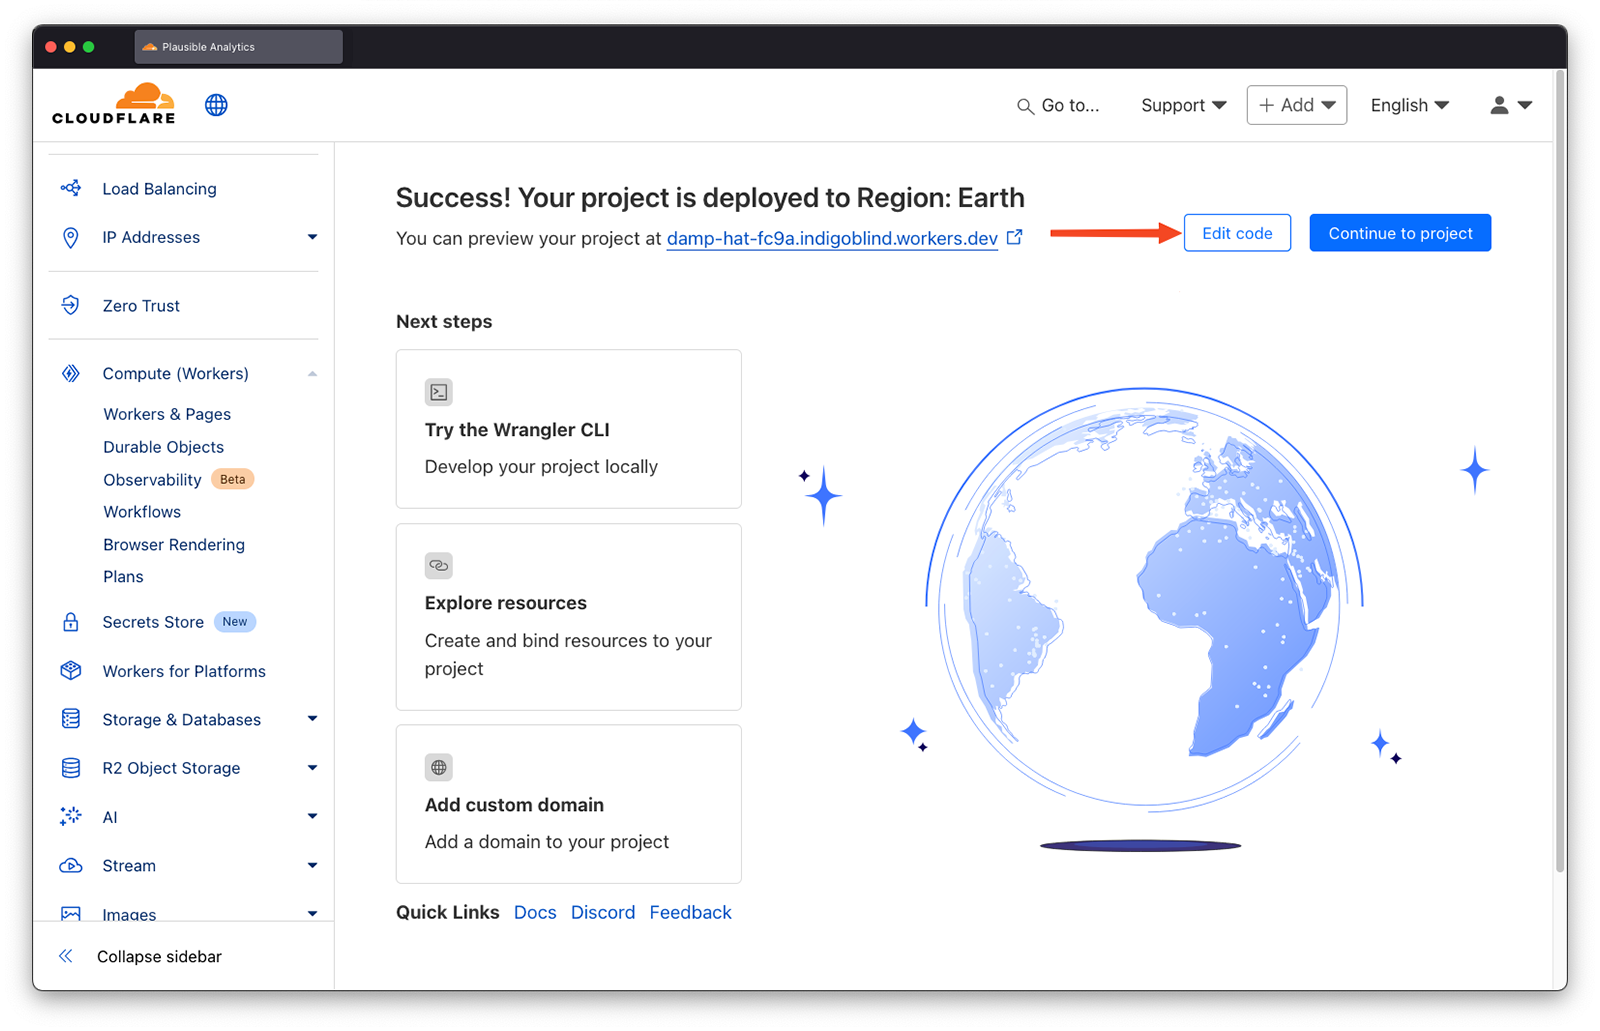
Next click on the 'Edit Code' button, remove the default code that Cloudflare presents and paste the code that we present below instead.
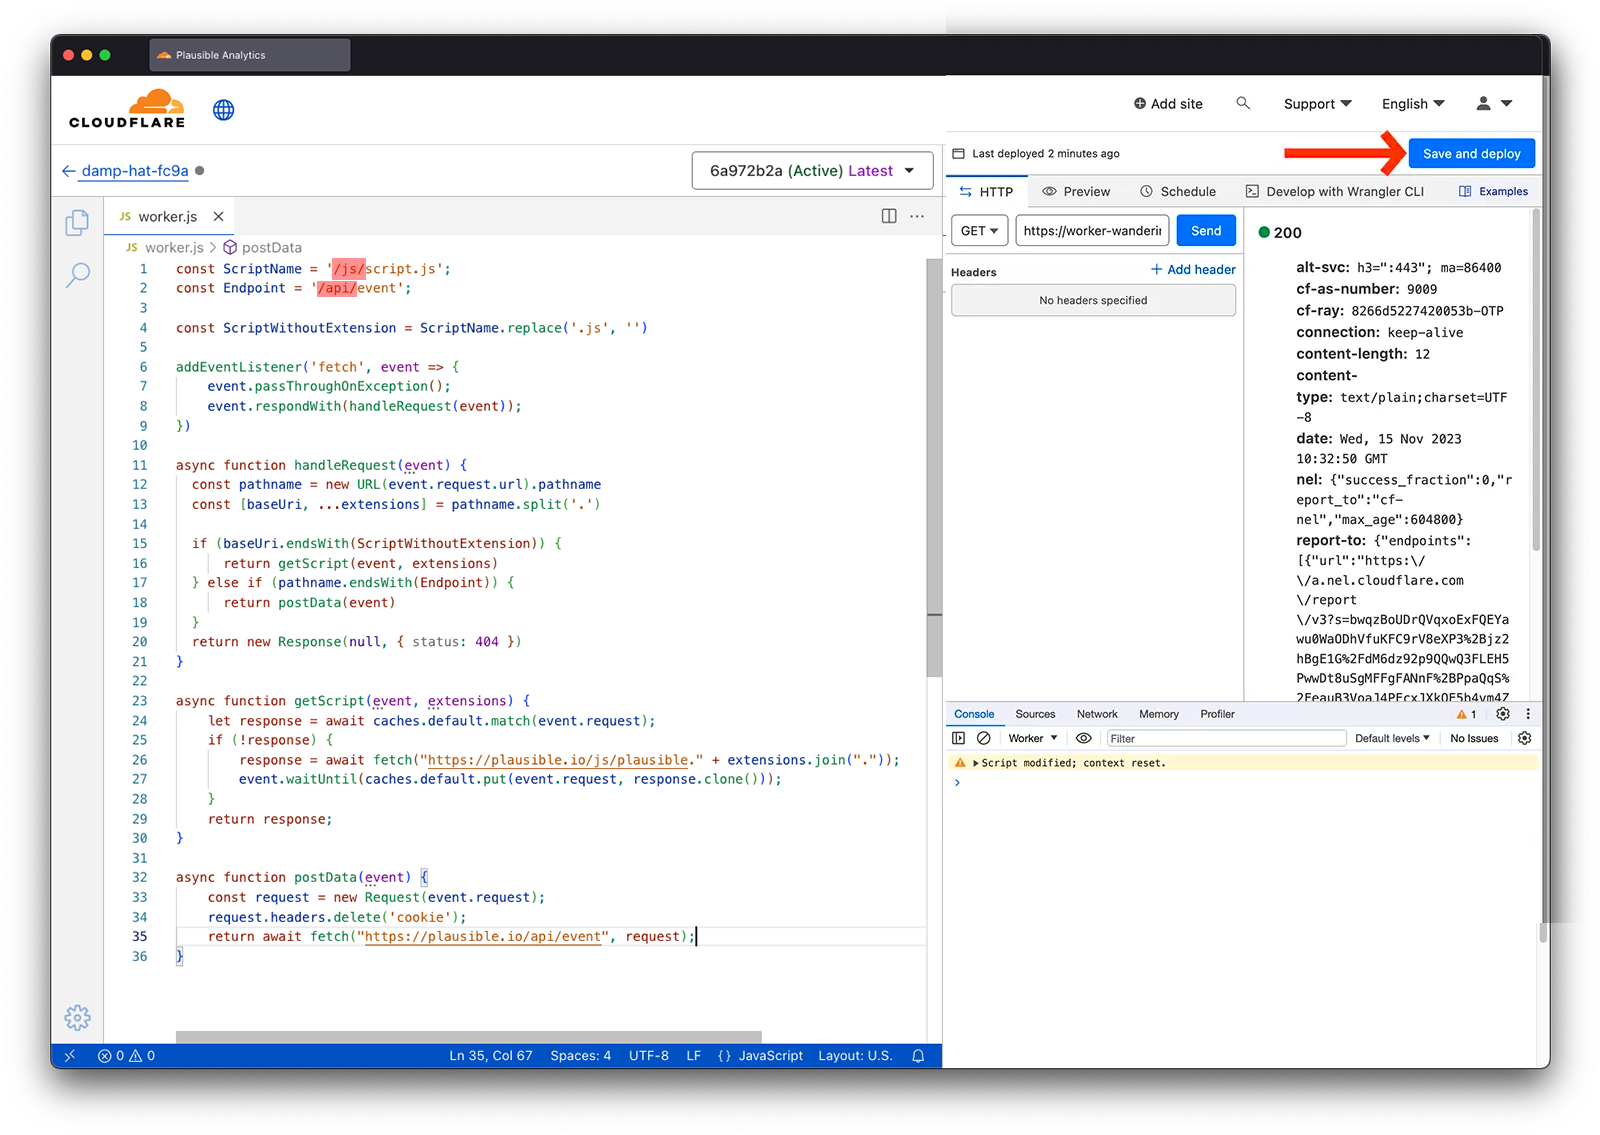
We recommend you change the folder name in the first two lines in the code below. This makes your proxy more difficult to discover and block. We especially recommend you change the folder name in the two lines if you're not hosting your site on the Cloudflare CDN.
In the ProxyScript line, change https://plausible.io/js/pa-XXXXX.js to your script location from step 3.
In the ScriptName line, change the /js/ to whatever you wish. Say /your-folder-name/. Then the location in the code would be /your-folder-name/script.js.
In the Endpoint line, change the /api/ to whatever you want. It can be the same as above but you can also choose something different. If you choose /your-folder-name/, then the full location would be /your-folder-name/event.
Do avoid words like 'plausible', 'analytics', 'tracking', 'stats', etc. as they may be blocked.
const ProxyScript = 'https://plausible.io/js/pa-XXXXX.js'
const ScriptName = '/js/script.js';
const Endpoint = '/api/event';

const ScriptWithoutExtension = ScriptName.replace('.js', '')

addEventListener('fetch', event => {
    event.passThroughOnException();
    event.respondWith(handleRequest(event));
})

async function handleRequest(event) {
  const pathname = new URL(event.request.url).pathname
  const [baseUri, ...extensions] = pathname.split('.')

  if (baseUri.endsWith(ScriptWithoutExtension)) {
      return getScript(event, extensions)
  } else if (pathname.endsWith(Endpoint)) {
      return postData(event)
  }
  return new Response(null, { status: 404 })
}

async function getScript(event, extensions) {
    let response = await caches.default.match(event.request);
    if (!response) {
        response = await fetch(ProxyScript);
        event.waitUntil(caches.default.put(event.request, response.clone()));
    }
    return response;
}

async function postData(event) {
    const request = new Request(event.request);
    request.headers.delete('cookie');
    return await fetch("https://plausible.io/api/event", request);
}
Once you've added the above code to the worker, you can click on the 'Save and Deploy' button on the top right. On the confirmation message, do confirm that you want to save and deploy your worker by clicking on the 'Save and Deploy' button again.
Step 4: Make sure the script is accessible
Now, the Plausible script should be accessible at the following URL:
https://your-worker-name.your-cloudflare-zone.workers.dev/your-folder-name/script.js
If you can load this URL and see some JavaScript code, you should be good to go to the following step.
Step 5: Integrate a new snippet into your site header
Once you have the URL for your script, you can replace your Plausible Analytics script tag in the Header (<head>) section of your site with the proxied snippet. This is how the new snippet should look like (make sure to edit it to have the correct domain name of your site and the correct URL to the proxied file):
<script async src="https://your-worker-name.your-cloudflare-zone.workers.dev/your-folder-name/script.js"></script>
<script>
  window.plausible=window.plausible||function(){(plausible.q=plausible.q||[]).push(arguments)},plausible.init=plausible.init||function(i){plausible.o=i||{}};
  plausible.init({
    endpoint: "https://your-worker-name.your-cloudflare-zone.workers.dev/your-folder-name/event"
  })
</script>
That's it! You're now counting your website stats using a proxy.
Step 6 (Optional): Run proxy as a subdirectory
If you're hosting your site on the Cloudflare CDN, you can run the proxy as a subdirectory installation to avoid a third-party
request to the workers.dev domain. This is completely optional but it can make your URLs look much cleaner and avoid third-party
requests.
In your Cloudflare account, click on the 'Workers & Pages' section in the sidebar. Then, click on the worker that you have just created and then choose the 'Triggers' options in the 'Settings' section of your worker. Next click on the 'Add route' button on the right-hand side of the 'Route' heading.
Next, in the 'Route' field enter the URL prefix where you would like to host the proxy. In this example, we'll install the proxy on the example.com domain, and we'll use qwerty as the subdirectory name. You can choose any name for the subdirectory, but it's a good idea to avoid words like 'analytics' and 'tracking'.
- Route:
*example.com/qwerty/*
Then select your domain name in the 'Zone' field. Then click on the 'Add route' button. After clicking 'Add route', the script should be accessible at the subdirectory URL of your site: https://example.com/qwerty/your-folder-name/script.js.
At this point you can change your Plausible script tag in your site header to reference the new URL. It's also important to specify the endpoint option in plausible.init() to make sure data is sent through the worker as well. The new snippet in your site header should look like this:
<script async src="/qwerty/your-folder-name/script.js"></script>
<script>
  window.plausible=window.plausible||function(){(plausible.q=plausible.q||[]).push(arguments)},plausible.init=plausible.init||function(i){plausible.o=i||{}};
  plausible.init({
    endpoint: "/qwerty/your-folder-name/event"
  })
</script>
Notice that since the script tag is installed on the same domain as the website itself, there's no need to specify the hostname in script src and plausible.init endpoint attribute. A relative path will work just fine.